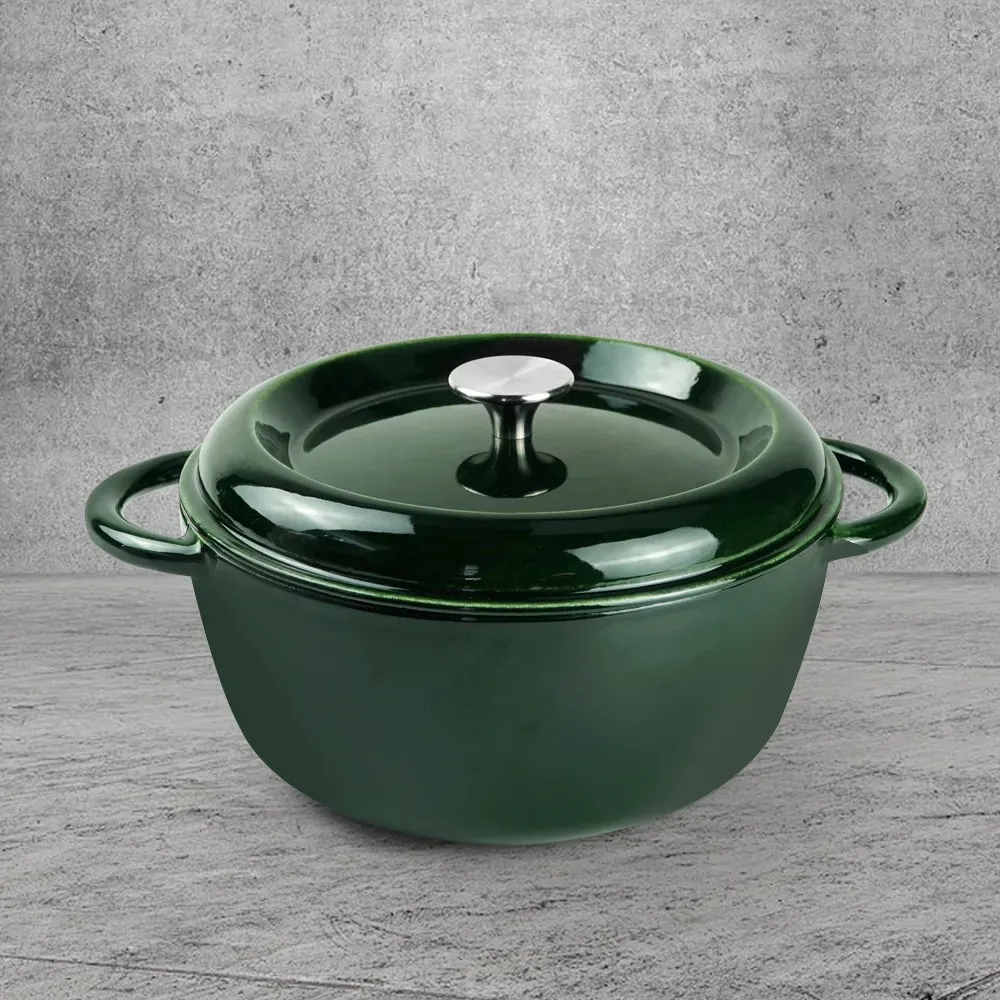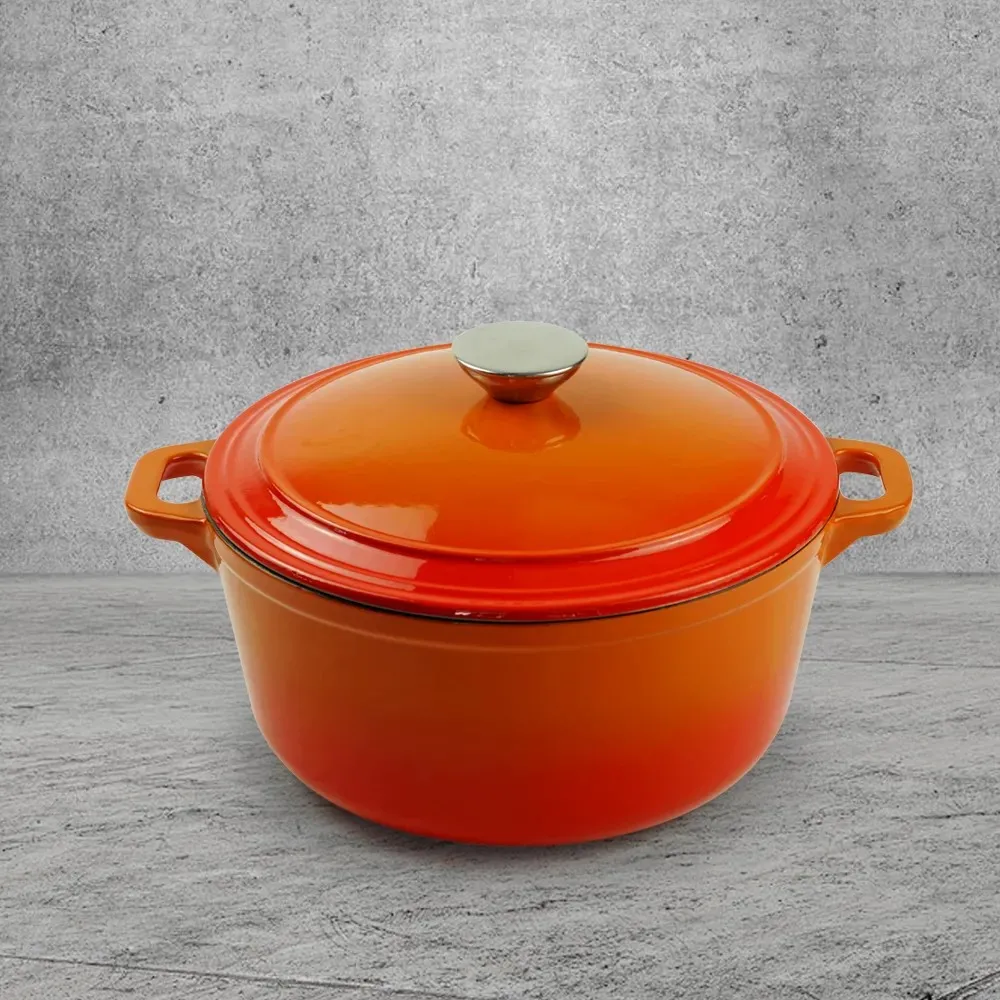
Enameled Cast Iron Casserole cookware can safely handle deep frying when it is used within its temperature and capacity limits. If you have searched can you deep fry in a Dutch oven, the short answer is yes: a heavy Dutch oven provides stable heat for fried chicken, doughnuts, tempura, and French fries. The key variables are the best oil for deep frying in a Dutch oven, how much oil to put in a Dutch oven for frying, and accurate oil temperature control. Understanding the oil’s smoke point, the Maillard reaction, and safe heat transfer prevents scorched food, dangerous splashes, and thermal damage.

Dutch Oven Wholesale Basics: Why a Dutch Oven Works for Deep Frying
A Dutch oven is suitable for deep frying because cast iron has high thermal mass. In practical terms, the pot absorbs and stores heat, so the oil temperature usually drops less abruptly when cold food is added than it would in a thin stainless-steel saucepan. Temperature recovery still depends on burner output, food quantity, oil volume, and the pot’s diameter.
Most deep-frying recipes target an oil temperature of 350–375°F (175–190°C). At this range, water in the food rapidly converts to steam, creating a vapor barrier that limits oil penetration while the surface undergoes browning reactions. If the oil falls below approximately 325°F (163°C), food can absorb more oil and develop a soft crust. If the oil remains above approximately 400°F (204°C), the exterior may burn before the interior cooks.
Related Dutch Oven Wholesale Terms You Should Know
- Smoke point
- The temperature at which an oil produces continuous visible smoke. Smoke indicates thermal decomposition and does not mean the oil is ready for frying. Common refined canola, peanut, sunflower, and soybean oils generally provide smoke points suitable for frying, but exact values vary by refining and manufacturer.
- Thermal mass
- The capacity of the pot to absorb heat. Cast iron’s thermal mass supports temperature stability, but it also means the vessel responds slowly when the burner setting changes.
- Maillard reaction
- A group of non-enzymatic browning reactions between reducing sugars and amino compounds. It contributes to the browned aroma and crisp surface of fried foods, particularly around 300–350°F (149–177°C) at the food surface.
- Flash point
- The temperature at which vapors can ignite in the presence of an ignition source. Oil should never be left unattended on a burner, and water should never be poured into an oil fire.
- Thermal shock
- Rapid temperature change that can stress enamel or cast iron. A cold, wet pot placed over high heat, or a hot enameled pot rinsed with cold water, may suffer surface damage.
Can You Deep Fry in a Dutch Oven Wholesale Pot? Comparing Enameled and Bare Cast Iron
Both bare cast-iron and enameled Dutch ovens can be used for deep frying, but they require slightly different care.
| Feature | Bare Cast Iron | Enameled Cast Iron |
|---|---|---|
| Deep-frying suitability | Suitable when clean, dry, and properly maintained | Suitable when the enamel is intact and manufacturer temperature limits are followed |
| Rust risk | Requires thorough drying and a protective oil film | Enamel protects the iron interior from rust |
| Metal utensil tolerance | Generally highly resistant to scratching | Use wood, silicone, or approved coated tools to reduce enamel chipping |
| Thermal shock sensitivity | Can crack or warp under extreme temperature changes | Enamel is particularly vulnerable to sudden temperature changes and impact |
| Cleaning after frying | Clean without stripping the seasoning unnecessarily, then dry and oil | Wash with warm water and mild detergent after the oil has cooled |
Inspect an enameled pot before use. Do not deep fry in it if the cooking surface has exposed iron, cracks, loose enamel, or chips around the rim. A damaged coating may worsen when exposed to repeated heating and utensil contact.
Dutch Oven Wholesale Guide to Choosing Oil and Oil Temperature
The best frying oil depends on flavor, cost, availability, and heat stability. A neutral refined oil is usually the most flexible choice for a home kitchen or commercial preparation area.
- Refined peanut oil: A neutral-to-lightly nutty option with a high smoke point; avoid it if peanut allergies are a concern.
- Refined canola oil: Mild flavor and widely available. It is practical for chicken, vegetables, and dough-based foods.
- Sunflower or safflower oil: Mild flavor and suitable for high-temperature frying when the label identifies it as refined.
- Soybean oil: Common in food-service frying because it is neutral and economical.
- Extra-virgin olive oil: Better reserved for lower-temperature cooking or finishing. Its flavor and smoke behavior make it less convenient for a large-volume frying session.
Use a clip-on candy or deep-fry thermometer. Infrared thermometers measure surface temperature and may be inaccurate when pointed at moving or reflective oil. A probe thermometer should be held in the oil without touching the pot’s base or wall.
How Much Oil to Put in a Dutch Oven for Frying
Never fill the Dutch oven to the rim. As a conservative household rule, keep the oil level below halfway up the pot, and leave enough headspace for food displacement and foaming. The exact limit should follow the cookware manufacturer’s instructions.
For many 5.5- to 7-quart Dutch ovens, 2 to 3 quarts of oil is often a workable starting quantity, but the correct amount depends on the vessel’s internal shape. Before heating, place the food in the empty pot and estimate displacement; remove the food, then add oil only to a level that leaves substantial headspace. The oil must not approach the rim when the food is added.
How to Deep Fry in a Dutch Oven Wholesale Pot: Step-by-Step Method
Step 1: Select the Right Dutch Oven Wholesale Size
Choose a heavy pot with a stable base and a capacity large enough to hold the oil and food without crowding. A 5.5- to 7-quart Dutch oven is suitable for many household batches. A wider opening makes it easier to lower food, monitor oil, and remove fried pieces, while a deeper vessel provides more splash protection.
Step 2: Check the Pot, Burner, and Work Area
Confirm that the Dutch oven is dry and free from chips or cracks. Place it on a level burner away from towels, paper packaging, wooden utensils, and other combustible materials. Keep long sleeves, children, and pets away from the cooking zone.
Do not use a small burner that heats only the center of a large pot at an extreme setting. Uneven heating can create local hot spots. A moderate burner setting with gradual preheating is safer and easier to control than maximum heat.
Step 3: Add Oil Without Exceeding the Fill Limit
Add room-temperature oil to the dry pot. Keep the oil below the manufacturer’s maximum line, or below approximately half the pot’s height when no line is provided. The remaining space accommodates food volume, bubbling, and expansion caused by water leaving the food as steam.
Step 4: Preheat Slowly and Verify the Temperature
Heat the oil gradually to the recipe’s target, usually 350–375°F (175–190°C). Stirring is not necessary, but monitor the thermometer continuously. If the oil begins smoking, turn off the burner and move the pot only if it can be done safely; never carry a smoking or flaming pot across the kitchen.
Step 5: Dry and Prepare the Food
Pat raw ingredients dry with paper towels. Excess surface water causes aggressive bubbling and oil splatter. For battered foods, allow excess batter to drip off before lowering the piece. For breaded foods, press the coating firmly onto the ingredient so loose crumbs do not burn in the oil.
Step 6: Lower Food Gradually
Use long-handled tongs, a spider skimmer, or a slotted spoon. Lower each piece away from your body and close to the oil surface rather than dropping it from above. Add food in small batches. Overcrowding can reduce oil temperature by more than 25–50°F in some home setups, depending on the food’s mass and moisture content.
Step 7: Maintain the Frying Range
Adjust the burner after the food enters the oil. The target is not a fixed burner setting; it is a stable oil temperature. Turn pieces according to the recipe and avoid moving them constantly, which can break the coating. If the oil remains below 325°F (163°C), pause the next batch until it recovers.
Step 8: Drain and Check Doneness
Remove food with a spider or slotted utensil and drain it over the pot for several seconds. Transfer it to a wire rack rather than stacking it directly on a plate, because trapped steam can soften the crust. For poultry, verify the thickest portion reaches a safe internal temperature of 165°F (74°C) according to standard food-safety guidance.
Step 9: Cool, Filter, and Store the Oil
Turn off the burner and allow the oil to cool completely before handling. Filter out crumbs with a fine-mesh strainer if the oil remains clear and has no burnt odor. Store filtered oil in a sealed, light-protected container and label it with the food type and date. Discard oil that is persistently dark, foamy, rancid-smelling, or unusually viscous.
Step 10: Clean the Dutch Oven
For enameled cast iron, wipe out cooled oil, wash with warm water and mild dish detergent, and dry fully. For bare cast iron, avoid prolonged soaking; dry over low heat and apply a thin layer of cooking oil if needed. Do not pour used oil into a sink, because it can solidify in plumbing. Place cooled oil in a sealed container for household waste or use a local recycling collection program.
Dutch Oven Wholesale Safety Rules for Deep Frying
- Never add water to hot oil. Water rapidly flashes into steam and can eject burning oil from the pot.
- Keep a correctly rated lid nearby. If a grease fire begins, turn off the heat if safe and slide the lid over the pot. Do not lift the lid immediately.
- Never use flour, baking soda, or a wet towel as a substitute for a fire extinguisher. Use a Class B or multipurpose Class K extinguisher according to its instructions, and call emergency services if the fire is not immediately controllable.
- Do not move a pot of burning oil. Carrying it can spread the fire and cause severe splash injuries.
- Keep the thermometer clipped securely. The probe should not touch the metal base, which can produce a false reading.
- Do not leave heating oil unattended. Cast iron retains heat after the burner is switched off, so temperature can continue rising locally.
- Use a stable burner and heat-resistant handles. Cast iron handles and lids become hot, even when the external temperature appears manageable.
- Protect enamel from impact and thermal shock. Avoid dropping frozen food into the pot, banging metal tools against the interior, or placing a hot pot on a wet or cold surface.
Dutch Oven Wholesale Troubleshooting: Common Frying Problems
Why Does My Fried Food Become Greasy?
The most common causes are low oil temperature, overcrowding, a wet coating, or holding the food in the oil too long. Use smaller batches, dry the ingredients thoroughly, and allow the oil to return to 350–375°F (175–190°C) before adding more food.
Why Does the Outside Burn Before the Inside Cooks?
The oil may be too hot, the food may be cut too thick, or the coating may contain sugars that brown rapidly. Reduce the temperature, use smaller or more uniform pieces, and verify internal doneness with a food thermometer.
Why Does the Oil Foam?
Foaming can result from moisture, starch, protein, detergent residue, degraded oil, or certain breading ingredients. Stop adding food, lower the heat, and observe the oil. If foam rises toward the rim or the oil smells burnt, switch off the heat and allow it to cool before disposal.
Can You Deep Fry in an Enameled Dutch Oven?
Yes, provided the enamel is undamaged and the manufacturer permits stovetop high-heat use. Avoid preheating an empty enameled pot at maximum heat, do not use sudden temperature changes, and use utensils that will not chip the coating.
Is a Dutch Oven Better Than a Deep Fryer?
A Dutch oven offers versatility, heat retention, and a large cooking cavity without requiring a separate appliance. A dedicated electric deep fryer usually provides an integrated thermostat, oil container, and basket, which can make repeated frying more convenient. For occasional frying, a Dutch oven is practical; for frequent, high-volume batches, a commercial fryer may provide more consistent temperature recovery and easier oil management.
Advanced Dutch Oven Wholesale Techniques for Better Results
Use Temperature Recovery as a Batch-Control Metric
Record the oil temperature immediately before adding food and again after 30–60 seconds. If the temperature drops sharply and takes several minutes to recover, reduce batch size or use a larger oil volume within the safe fill limit. This approach is more reliable than judging readiness by color alone.
Choose Food Shapes That Cook Evenly
Uniform pieces transfer heat at a similar rate. For potatoes, pieces around 1/4 to 3/8 inch thick are common for fries, while chicken pieces should be similar in size within a batch. Thick food requires more time for conductive heat to reach the center, increasing the risk of an over-browned surface.
Try a Two-Stage Fry for Crisp Potatoes
For fries, a lower-temperature first stage, often around 300–325°F (149–163°C), cooks and dehydrates the interior. A second stage around 350–375°F (175–190°C) develops a crisp surface. Allow the oil to recover between stages and avoid overcrowding.
Use a Wire Rack Instead of Paper Towels
A wire rack allows air to circulate around the food, reducing condensation on the crust. Paper towels can absorb surface oil, but they also leave the underside in contact with steam. For high-volume preparation, a rack over a rimmed tray gives more consistent texture.
Manage Oil Quality, Not Only Oil Temperature
Repeated heating accelerates oxidation and polymerization. Crumbs, salt, water, and prolonged exposure to high heat shorten oil life. Filter oil after cooling, avoid mixing strongly flavored oils, and replace it when sensory changes indicate degradation. In commercial kitchens, follow the operation’s documented oil-quality testing and disposal procedures.
Dutch Oven Wholesale Buying Checklist for Home and Food-Service Use
If you are purchasing a Dutch oven for deep frying, evaluate more than advertised capacity. The following specifications affect safety and performance:
- Interior diameter: A wider opening improves access and reduces food crowding.
- Wall and base thickness: Heavy construction improves heat retention but increases preheating and cooling time.
- Lid design: A secure lid can help smother a grease fire, but it should not be used to seal steam into actively frying food.
- Handle design: Large, heat-resistant handles are easier to grip with oven mitts.
- Enamel condition: The cooking surface should be smooth, continuous, and free from chips.
- Thermometer compatibility: A stable rim allows a clip-on thermometer to remain in position.
- Manufacturer instructions: Follow published temperature limits, stovetop guidance, and cleaning recommendations.
For restaurants, caterers, and retailers comparing Dutch Oven Wholesale options, request documentation on material composition, coating performance, heat limits, dimensional tolerances, packaging protection, and food-contact compliance. Cookflower can be contacted for product selection, cookware specifications, and wholesale service requirements.
FAQ: Deep Frying in a Dutch Oven Wholesale Pot
Can I deep fry in a Dutch oven on a gas stove?
Yes. Use a burner that supports the pot evenly, keep the flame below the pot base rather than around the sides, and monitor the oil with a thermometer. Gas burners can respond quickly, so reduce the flame as the oil approaches the target temperature.
Can I deep fry frozen food in a Dutch oven?
Frozen food can be fried only when the product instructions permit it and the pieces are free of loose ice. Ice causes violent bubbling and splatter. Add frozen items slowly and in small batches, keeping your face and hands away from the pot.
Can I use the Dutch oven lid while deep frying?
Do not cover the pot during normal frying because condensation can drip into the oil and cause splatter. Keep the lid nearby as a fire-smothering tool, but do not use it to seal an active boil or cover food while oil is bubbling aggressively.
How long does oil take to heat in a Dutch oven?
There is no universal time. Oil volume, burner power, pot material, starting temperature, and room conditions all affect heating. In many home kitchens, several quarts of oil require approximately 10–20 minutes to reach frying temperature, but the thermometer—not the clock—should determine readiness.
Can I use olive oil for deep frying in a Dutch oven?
Refined olive oil can be suitable for frying when its label and smoke point support the intended temperature. Extra-virgin olive oil may add a strong flavor and is often more expensive for large-volume frying. Select oil based on the manufacturer’s specifications and the recipe’s heat requirement.
What should I do if the oil catches fire?
Turn off the heat only if you can do so without reaching through flames. Cover the pot with its lid if safe, evacuate the area, and call emergency services. Never use water and never carry the pot. A properly rated Class B or Class K extinguisher is the appropriate emergency equipment for oil fires.
Conclusion: Choosing Cookflower Dutch Oven Wholesale Cookware
Deep frying in a Dutch oven is practical when you control three variables: oil temperature, oil volume, and batch size. A heavy cast-iron or intact enameled cast-iron vessel can provide stable heat for fried chicken, vegetables, seafood, and desserts, but it does not replace a thermometer or basic fire-safety procedures. For shoppers and businesses comparing Dutch Oven Wholesale products, Cookflower offers a useful starting point for reviewing cookware construction, enamel options, capacity, and wholesale support. Whether you need guidance on can you deep fry in a Dutch oven, the best oil for deep frying in a Dutch oven, or how much oil to put in a Dutch oven for frying, choose a suitable pot, maintain 350–375°F (175–190°C), and leave adequate headspace for safe, consistent results.